#
Getting Started
NCMS will no longer be updated. There is good alternative, with same functionality and some other good features: NML
You can get NML there: https://github.com/WorldBoxOpenMods/ModLoader
To start moddin using NCMS, you need to have installed NCMS in your game.
You can download it here.
I suggest you to use Visual Studio Code.
If you have installed NCMS and Visual Studio Code or other editor, you can prepare your mod structure in Mods folder (in root WorldBox folder):
I suggest to you to make your mod as folder while you making it, because it is easier way to test your mod in WorldBox.
Right here you should have done with the files preparations, your mod folder should looks like this:
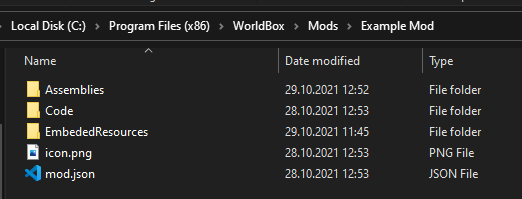
Note that Assemblies and EmbededResources folders are not important, you can remove them if you will not use it.
Now you can start modding.
Create Main.cs file inside Code folder. Open it with your editor. Write the base mod's code:
using System;
using UnityEngine;
using NCMS;

namespace Example{
    [ModEntry]
    class Main : MonoBehaviour{
        void Awake(){
            Debug.Log($"Hello world from {Mod.Info.Name}!");
        }
    }
}
First 3 rows is just necessary usings.
Your mod can have any namespace name and classes names, but better to name main namespace with your mod name.
[ModEntry] — the entry poin of your mod. You must put it above your main mod's class which is inherited from MonoBehaviour.
Inside Main class you can start coding your mod. This is default Unity's GameObject, so all Unity scripts features available here.
void Awake(){
    Debug.Log($"Hello world from {Mod.Info.Name}!");
}
This is default Unity's lifetime method Awake.
Inside this method is just default log command to know that our mod loaded, but only one thing interesting here: Mod.Info.Name.
Each mod have its own global object: Mod, which contains Info field with information about mod, and GameObject field, which represents GameObject to which mod's script attached in Unity game.
To get information about global object Mod, please follow this reference:
All prepatations done! Now you can code your mod, make other .cs files with code if you need and other.
You can check code examples following this reference:
After you have done making your mod, you must make zip archive with your mod folder content (mod.json file, Code, Assemblies, EmbededResources folders should be in archive root)